If the Germs don’t make you sick, Cleaning them might

I like things easy and convenient just as much as the next gal (guy). But after cancer became all too personal in our own home, we’ve had to rethink everything we knew about a sparkley, sanitized home. I’ve cleaned houses professionally, for about the last 10 years. And I’ve leaned a lot from our Natural Doctor to endless research over the years. However (oh here comes the disclaimer) Let’s take this stuff with a grain of salt. For instance- the fad reports. Diet soda & painting your nails make you fat. No eating chocolate cake for breakfast makes you fat. But these reports on toxic ingredients, we can’t ignore. As they have been gaining recognition from even the medical community. My Mom’s regular MD told her to stop using bleach.

You can’t be 100% organic right? My justification is we’re not bathing in this stuff. Yet most of us use sanitizing products everyday. Raw chicken juice splattered can carry it’s own risks, right? We all know that. But what about the amount of germs on our cell phones? Did you know our electronics (phone, Tablets, TV remotes) have about 10 times more bacteria than toilet seats! Seriously. Then add  Junior using your Tablet as you wait at the Dentist, think of all the places his little hands have been..

But some of these toxic cleaning solutions, even room spray require special garbage disposal. Crazy. If you care about your health, your family, your pets and our earth: here are a few alternatives. Don’t wait, get your home healthy now.

cleanwell
Click to order
These are two of my Favorites. Both sanitize and disinfect just as well as their toxic alternative, yet way better for your health, your family and our planet. I have used these in my Professional House Cleaning Business and in my own home.

If you still need PROOF, the following are some symptoms that may be a result of using cleaners that are not natural:

Glass cleaners, laundry stain removers, carpet cleaners, automobile cleaners, windshield wiper fluid, de-greasers, oven cleaners, and rust removers:

A skin and eye irritant also associated with blood disorders. In laboratory experiments, exposure to high doses of 2-BE has been shown to cause reproductive problems.

Window cleaners, drain cleaners, toilet cleaners, bathroom cleaners, oven cleaners, stainless-steel cleaners, car polish, and all-purpose cleaners:

Vapors may irritate the skin, eyes, throat, and lungs. People with asthma may be particularly sensitive to the effects of breathing ammonia. Ammonia may also cause kidney and liver damage.

Coal tar dyes found in most types of cleaning products:

Derived from petrochemicals, and may be contaminated with trace amounts of heavy metals like arsenic, cadmium and lead. There is concern that synthetic dyes may cause cancer and that heavy metals can harm the nervous system and cause other adverse health effects.

Liquid laundry detergents, all-purpose cleaners, floor cleaners, car wash products, de-greasers, dishes soap, oven cleaners, and glass and surface cleaners:

A possible human carcinogen that is persistent in the environment. DEA is a mild skin and severe eye irritant. MEA is known to induce asthma in workplace settings.

Fragrance chemicals found in most cleaning products:

More than 3000 chemicals are used in fragrance mixtures. Many are irritants and can trigger allergies, migraines, and asthma symptoms. In addition, synthetic musks used in detergents build up in the environment and can be toxic to aquatic organisms & humans.

Liquid laundry detergents, stain removers, all-purpose cleaners, air fresheners, toilet bowl cleaners, de-greasers, and car wash products:

Degrade into nonylphenols (NPs), which can mimic the hormone estrogen. In laboratory experiments, NP has been shown to stimulate the growth of human breast cancer cells and cause adverse reproductive effects in fish and other aquatic organisms.

Abrasive cleaning powders:

Rated by the International Agency for Research on Cancer as a known human carcinogen. This natural ingredient (made from finely ground quartz) is hazardous as a dust if inhaled.

Toilet bowl cleaners, deodorizers, surface cleaners, and disinfectants:

Corrosive; severe eye, skin and respiratory irritant. It can also form chlorine gas, which will burn the eyes, nose and mouth. Studies have found that high doses of this chemical cause kidney damage. In its concentrated form, this chemical is very toxic to aquatic organisms and may cause long-term effects in aquatic ecosystems.

Oven cleaners, bathroom cleaners, disinfectants, drain openers, and toilet bowl cleaners:

Highly corrosive; can burn the eyes, skin and lungs and is a respiratory irritant. Long-term exposure in the air may lead to ulceration of the nasal passages and chronic skin irritation.

Dish soap, liquid laundry detergents, cleaning towelettes, and toilet bowl cleaners:

Sodium lauryl sulfate is a skin irritant and may be toxic to the environment. Sodium laureth sulfate is the “ethoxylated” form of this chemical, which is less harsh. However, the process of ethoxylation can leave behind traces of 1,4-dioxane, a possible human carcinogen that is persistent in the environment (see also DEA, MEA, TEA).

Dish soaps and disinfectants, as well as a wide range of antibacterial products:

Toxic and a suspected endocrine disrupter that can mimic or interfere with the function of hormones. The European Union classifies triclosan as irritating to the skin and eyes, and as very toxic to aquatic organisms, noting that it may cause long-term adverse effects in the aquatic environment.

Bathroom cleaners and possibly some laundry detergents (more common in industrial formulations):

Rated by the International Agency for Research on Cancer as a possible human carcinogen. In an assessment of nitrilotriacetic acid (NTA).

Information brought to you from: David Suzuki Foundation  The above may not be approved or proven, and in some cases, opinion. But if you like to read and would like to further research: Green Cleaning & Dr Weil (there are many more sites on the web as well).


How this works: I am a Amazon Associate, when you order the natural cleaning products I recommend, you support my business and Green Living! Win. Win. Have a joyful, peace-filled day!

pure green 24
Click here to order


cleanwell
Click to order
Oh, also if you need more personal organizing or natural cleaning help, reach out today. Or maybe you know someone who does! Don’t wait. Click here to contact me.
Stylish Organizing Products- Check out my Organizing Products Website: Click here Now


Getting Dinner on the table. On time.

Is it possible to get a healthy meal on the table before the sun comes up for the next day? Yes. But you have to keep it simple. And organized. I work outside our home, so our busy family has to be efficient and really organized. Otherwise its Micky D’s to the rescue. Actually our kids refuse to eat it now. Something about me feeding it to them too much when they were younger. Or something. No actually, I am glad they appreciate a home cooked, healthy meal. How then?

Menu Planning

  1. Create a master list to create your Weekly or Monthly Meals. Here is my actual list, if you so please to use. Dinner meals
  2. Use lists of your choice

Are you really crafty? 

Or more practical (I mean short on time)  I really like this option, it is all in one! 

91r3N-mCbjL._SL1500_


I also really like these options that add style and efficiency. 

Check out: My website (click here now):


Organize Plastic Containers and Cookware

20160224_093630
Before
20160224_095309
After

Looking at the Before & After pictures, the Before is not terrible, yet makes it hard to get to the bakeware when needed. Also stacking non stick pots and pans into each other, is a major no no. This took me less than 20 minutes to organize, as the dividers were handy. So how do you escape from the ‘tupperware‘ nightmare and chaos of unruly Pots and Pans? Let’s find out. We will go step by step, starting with Pots and Pans.

Supplies for Pots & Pans:

  1. Trash bag or empty cardboard box
  2. Cleaning spray & rag
  3. Glass of water
  4. Organizing Products specific to space, needs and style

Steps for Pots & Pans:

  1. Clear a large clean space on counter or table to sort
  2. Grab a trash bag or a cardboard box for any donations
  3. Empty out cupboard on the surface you cleared
  4. Grab a cleaning cloth and spray down all shelves, inside and outside of cupboards (trust me, you’ll appreciate in the end) Option: put down any extra contact paper you may have
  5. Be honest. Do you use all these? Used within the last year? (is it nasty looking?)
  6. If you have any non stick cookware, be sure to toss out any scratched, it can be a health risk. (potential risks of certain cookware)
  7. Put donate items in box or bag
  8. Match up lids with pots and pans.
  9. Donate lids with no pot or pan
  10. Really large bulky cookware you only use around the holidays or special parties, should be stored elsewhere (pantry, garage shelf, basement)
  11. The large heavy cookware you do use often (crockpot, dutch oven) place on a bottom shelf
  12. Lets start simple by organizing your lids. Here are some product choices depending on your space and your style:
  13. Vertical Lid Storage. This can be attached to a wall or a inside cupboard door:
    wall lid holder
    (click here) order to your door


14. Flat Surface Lid Storage for inside cupboard:

Flat lid holder
(click here) order to your door

Wire Dividers Chrome Large


A taller version in chrome


15. Now it is time to implement the remaining cookware. Keep your Cookware upright and free from getting damaged. In this Cupboard Pots and Pans Divider:

Pot and pan organizer
(click here) order to your door

Also a version that will fit in your cupboard

vertical pan


16. Wall Option- if you have no cupboard space:

wall pan hang
(click here) order to your door

wall pan hang 2


16. Do you need more shelves? Create them:

Clever Container Product Image

Great Job! If you need any personal help, just email me (click here). Now- onto Plastic Containers (tupperware):

PicsArt_02-24-10.35.29
Before
PicsArt_02-24-10.36.52
After

Steps for Plastic Containers:

  1. Clear a large clean space on counter or table to sort
  2. Grab a trash bag or a cardboard box for any donations
  3. Empty out cupboard on the surface you cleared
  4. Grab a cleaning cloth and spray down all shelves, inside and outside of cupboards (trust me, you’ll appreciate in the end) Option: put down any extra contact paper you may have
  5. Be honest. Do you use all these? Used within the last year? (is it nasty looking?)
  6. If you are missing the matching mate, toss lids in recycle and if you are inclined, donate any mismatched containers
  7. It is ok to stack same size containers in each other, yet please do not get in the habit of stacking small to large, it is just too hard to get to in a rush.
  8. In my Before and After Example above, we are using a Lazy Susan. You can use various options.
  9. Drawer:   (click here) order to your door


10. Cupboard:

Clever Container Product Image
(click here) order to your door


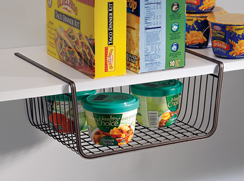
Add a quick extra (under) shelf for plastic lids:Shelf Help

11. Toss small lids in a small to medium  clear basket

(click here) order to your door

12. May I suggest placing the give away (you know the ones that you send family off with left-over food in) put it in a different location. I used two extra large Ziploc Bag (you can get them at the Dollar Tree too). One for lids, and one for the containers, then I placed them in the pantry.

Awesome! You did it, nice job! If you need any personal help, just email me (click here)

Oh, and for every $40+ order placed, I will email or send you a hard copy of these step by step instructions. Happy Organizing! ♥

Need personal in home organizing coaching? I can help. Don’t wait. (click here)

Would you like to order other products? Check out my website.


http://rcm-na.amazon-adsystem.com/e/cm?t=sparkleyourho-20&o=1&p=12&l=ur1&category=primegift&banner=10BSGCHPCJG0HZN45H82&f=ifr&linkID=PHCUWI2OEPAMCS7P

Kitchen Pantry Organize 101

1454401146808

How much more of a pleasure and less of a task putting groceries away can be, when you have an organized kitchen and pantry. It is simple to keep up once you form order. Simple instructions:

  1. Clear a large surface area to work on. Such as a table or clean counter
  2. Have (several) large Garbage Bags
  3. Have a Bag with handles for possible donate to a Shelter
  4. Cleaning spray and towel
  5. Have a recycle bin within reach
  6. Your new (and existing) containers can be off to the side. (using clear containers is key)
  7. Pull out every item. One by one.
  8. Ask yourself these three questions:
    1. Is this expired?
    2. Is it healthy for our family?
    3. Will we eat this?
  9. Toss it if expired
  10. Put in donate Bag if your family won’t eat it or it is unhealthy. IF it is not expired, that is
  11. Items you are keeping, set on counter or table
  12. Once all shelves are completely empty, spray and wipe down inside of cupboard doors first. Then wipe down each shelf starting from the top, working to the right
  13. Now we will start sorting. Items that are not used or eaten often, should go on top shelves. Unless very heavy or bulky. Items such as (if you must) unhealthy snacks, marshmallows, etc. Put them in the Containers that will fit items, and put away
  14. Then start sorting and setting in groups, like items
    1. Canned goods- sort by soups, Canned sauses, etc
    2. Boxed goods
    3. Baking items
    4. Oils
    5. Sauses, merinates
    6. Bagged items, chips
    7. Snacks
    8. School snacks (should be in own category, makes packing lunches so much easier!)
  15. Baking items, such as sugar, flour, etc, place in Air Tight Container
  16. Once every item is sorted, find the correct sized containers for each category. Place items in the designated container, and place on shelf. 
  17. Once items are in containers, you can move them around from shelf to shelf depending on height and convenience. This part of the task is much easier when your items are in the containers. FB_IMG_1454403326008
  18. Another option if you are tight on spaceShelf-Help_detail
  19. Or go vertical0338-lg (1)
  20. If you want to go one step further- Labeling. It adds a touch of class and function.
  21. You may find you have more food than containers, or you need a few more containers. No problem! Just reach out to me, and I can help. Simply set the leftover food or items on a shelf off to the side, until your containers arrive. If you need to exchange or return anything, I am happy to help!

And voila! PicsArt_02-03-01.12.08

Congratulations, you did it! I’m proud of you!! Take your own picture now, to show you are following through with your goals of a Journey to an Organized Home!

What are you waiting for? Get Organizing today! (click here)
hollipask@gmail.com

How I can Help:

1. Journey to an Organized Home Monthly Group. Organize Your Entire Home in a year. Earn 10% off Products for sticking with the Group.
2. Would you like Free Organizing Products? Host an Event
3. Personal In Home Organizing Consultation (personal in home, hands on coaching)
4. Simple + Easy way to earn extra income
Continue reading “Kitchen Pantry Organize 101”

A disorganized home is dangerous


Could having a Disorganized Home be bad for you? Yes. It can. How?

  1. Fire Hazard. Due to doorways blocked. Also, papers stacked up act like fire kindling.
  2. Clutter can also be a tripping hazard. Too heavy shelves can fall on someone.
  3. Cleaners and toxins left unkept and out can be dangerous for children and animals, by accidental ingestion.
  4. Clutter can attract pests.
  5. Unorganized clutter can also cause allergies, due to built up dust and grime.
  6. Causes Stress- Not only is an unkept disorganized home hazardous, but let’s look at how clutter can effect your mental health. In a study done by Princeton University proves it is hard to concentrate in a cluttered home. The mess can compete for your attention and cause decreased concentration and increased stress. Let me share an example in my own life. When I was just starting out as a professional organizer, all our kids were still at home. Our son is the oldest and pretty much had the whole “keep your space clean” thing figured out. But I had two girls under age 4. They loved to play, create and make a mess. I had rules in our playroom that they could not go in until it was clean and picked up. A- Becuase it would end up a giant mess. And B- I found that my kids were more creative, happy and got along better when there was order. Go figure! Toys had a home and were labled with fun bright pictures. Maybe. Just maybe had something to do with my mood and stress level. But not just that, our middle daughter, very creative and loved to make a mess, announced to me (she was about 4) “thank you Mama for cleaning up” on several occasions. My kids are much older now. They are not perfect at keeping their areas clean, we are far from a perfect family (I’ve relaxed alot too). They have the tools to pick up quickly because there are systems in every room in our home. It’s not about perfection (I had to learn this the hard way. Still learning.) it’s about creating order and harmony in your home. Maybe you need some help. Possibly coaching. You are not alone. Ask me how I can help, don’t wait. Now is the time!(click here) Reach out now

Another great article, how a disorganized home is bad for your health.

Do You Make These Organizing Mistakes?


Happy New Year! As we embark upon a new year, do you feel the urge to get your home and life in order? But are you going about organizing the wrong way? Spinning your wheels but not moving forward. Here are a few Organizing Mistakes that make your house look messy, brought to you by HGTV. Are you making these mistakes? See how to avoid them.

(click here) HGTV Organizing Mistakes

Here’s my 2 cents that might just change your Life. Well. Ok. At least clean up your Home a bit:

  1. Have a “catch all” bin in each room. However. There are some rules. When the bin is full, clean out & put items away, starting from the bottom. Clean out at least 1/2 (Goal: clean out the whole bin the end of every month). And NEVER put important items or papers
  2. Each family member (household member) should have their own laundry basket, named & labeled. Also a good idea to have their own laundry day. From beginning to end, before bed, laundry is clean, folded & put away.
  3. So your ready to Organize a space (or you’ve had and you must do something about it. Now.). Get your Tools ready. Have a KEEP bin. A TRASH bag. A RECYCLING bin. A different color TRASH bag (to distinguish the difference) for DONATE. Pull out the large bulky items first and sort them. If they are very large (blankets, large toys, pillows and you are keeping) just put them away. It is much easier to have less to sort and visually see items when those large items are out of your way. Then sort the rest of items starting at a focal point. A door or window. Round your way back to that door or window, in a circle of sorts, touching all items needing organized. When you’ve sorted everything, put KEEP items away, put DONATE items in your car. Take TRASH & RECYCLING out.

Would you like to make it your Goal this year to be more organized? Is there a way to Organize your Home, once and for all, the entire house? YES! Monthly Group Goals (taking a little bit at at time) to help you do just that! We are in this together. Click here to check it out: Journey to an Organized Home

1451874019668

**Oh, maybe you need a little extra hands on help (or know someone who does). I make Housecalls. Call or message me for a Free no obligation consultation. Happy Organizing!

The Morning Mayhem

20151202_130101
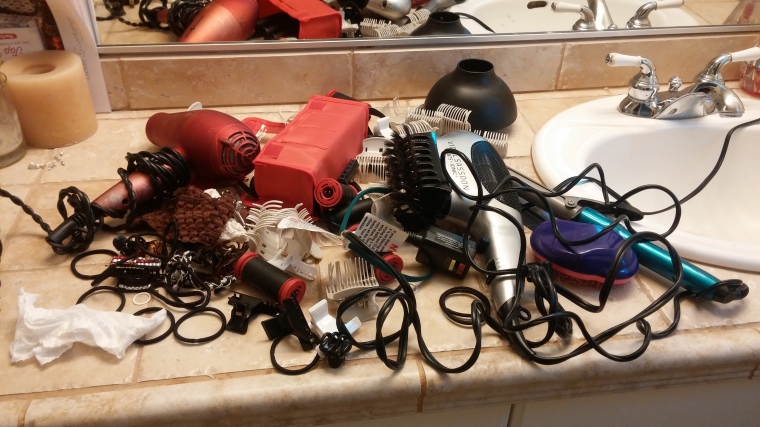
Bathroom Counter Before (after the morning rush)

Does this look like your morning regimen? It looks like a hot mess! Seriously, is that a used tissue? Probably my husband’s. This rings true for all of us at one time or another. Where does it go after you are done? Or let’s be honest, later that day or even before bed, it gets shoved in a drawer (or left out forever).

Let’s go step by step:

20151202_131822

1. Roll up all the cords & set the dryers and curling irons aside.

2. I use hair rollers, so put them back away & roll up the cord. Or use a Velcro cord holder. (I love those, they keep cord neat and still room to plug in)

20151202_132147

3. Get your Container solutions out & ready to go
4. Put your curling irons & dryers in Large Basket on bottom

20151202_132917
5. For my hair rollers, I put the clips in the Medium Basket
6. Next I used a Small Clear Container to put all my hair ties in
7. Put the Baskets under your sink, you may have to go around the piping and push the Baskets back of your curling irons are hanging out like mine
8. Viola! This took me less than 10 minutes. Give or take time due to amount of accessories. You can do it!!
9. Option: You can turn Baskets if your limited in space

20151202_133233

Get THIS Solution. To order: email hollipask@gmail.com

Sliding glass door gunk

Before clean
Before clean, gross

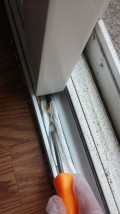
My wonderful husband power washes our backyard concrete patio every year. (I don’t even have to ask him) After he is done, this is the aftermath of our bedroom sliding glass door. Ick, right? It got to the point I didn’t like opening the sliding glass door anymore, and we love fresh air. Especially this time of year. So I finally made the time, and this is how I beautified it…

20150907_124528

  1. Organic All Purpose Cleaning solution, not diluted
  2. Squirt bottle
  3. Flat head screw driver
  4. Paper towels
  5. Garbage bag
  6. (Optional- cleaning gloves if your a bit of a germafobe, like me.)
  7. (Optional- protein bar, water… You may be here awhile)

Step A. Squirt your cleaning solution directly onto the window track (Wait about 5 minutes, for it to do it’s thing. Option- do a 5 minute plank while your waiting. Might as well get some core work in!)

Step B. Grab a few paper towels. Use your screw driver and paper towels to get down into the grooves (baby).

20150907_125137

Step 3. Just keeping wiping, wiping, wiping your grimy cares away! Try to get the most of of your paper towel, use all of it. Let’s be responsible where we can.

20150907_125548

Step 4. IF you want to go one step further, use good ‘ol toothpaste and a Q-tip to get into those nasty corners.

20150907_132206

Step 5. Do a little jig, celebrate your clean windows, and open those babies up!!

AFTER Left side
AFTER Left side
AFTER Right Side
AFTER Right Side

I did take this opportunity to also shine both sides of the windows. **Also use this step by step to clean other windows in your home, easy as pie friends!

As I embark on my new adventure of selling organizing products for everything in your life, check back often as I talk about other hard to clean/ organize areas of your home. Tips & tricks I’ve learned being a organizing guru for 10 years and professional (organic) house cleaner for 6 years. (If you would like ideas for the best organic, natural cleaning products, I be happy to offer advice.)

Learn more about organizing your home before the Holidays! Only 73 more days…

Invite

Click here to see my upcoming organizing launch!