Looking at the Before & After pictures, the Before is not terrible, yet makes it hard to get to the bakeware when needed. Also stacking non stick pots and pans into each other, is a major no no. This took me less than 20 minutes to organize, as the dividers were handy. So how do you escape from the ‘tupperware‘ nightmare and chaos of unruly Pots and Pans? Let’s find out. We will go step by step, starting with Pots and Pans.
Supplies for Pots & Pans:
- Trash bag or empty cardboard box
- Cleaning spray & rag
- Glass of water
- Organizing Products specific to space, needs and style
Steps for Pots & Pans:
- Clear a large clean space on counter or table to sort
- Grab a trash bag or a cardboard box for any donations
- Empty out cupboard on the surface you cleared
- Grab a cleaning cloth and spray down all shelves, inside and outside of cupboards (trust me, you’ll appreciate in the end) Option: put down any extra contact paper you may have
- Be honest. Do you use all these? Used within the last year? (is it nasty looking?)
- If you have any non stick cookware, be sure to toss out any scratched, it can be a health risk. (potential risks of certain cookware)
- Put donate items in box or bag
- Match up lids with pots and pans.
- Donate lids with no pot or pan
- Really large bulky cookware you only use around the holidays or special parties, should be stored elsewhere (pantry, garage shelf, basement)
- The large heavy cookware you do use often (crockpot, dutch oven) place on a bottom shelf
- Lets start simple by organizing your lids. Here are some product choices depending on your space and your style:
- Vertical Lid Storage. This can be attached to a wall or a inside cupboard door:

(click here) order to your door
14. Flat Surface Lid Storage for inside cupboard:


A taller version in chrome
15. Now it is time to implement the remaining cookware. Keep your Cookware upright and free from getting damaged. In this Cupboard Pots and Pans Divider:

Also a version that will fit in your cupboard

16. Wall Option- if you have no cupboard space:


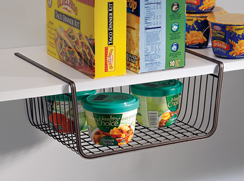
16. Do you need more shelves? Create them:

Great Job! If you need any personal help, just email me (click here). Now- onto Plastic Containers (tupperware):


Steps for Plastic Containers:
- Clear a large clean space on counter or table to sort
- Grab a trash bag or a cardboard box for any donations
- Empty out cupboard on the surface you cleared
- Grab a cleaning cloth and spray down all shelves, inside and outside of cupboards (trust me, you’ll appreciate in the end) Option: put down any extra contact paper you may have
- Be honest. Do you use all these? Used within the last year? (is it nasty looking?)
- If you are missing the matching mate, toss lids in recycle and if you are inclined, donate any mismatched containers
- It is ok to stack same size containers in each other, yet please do not get in the habit of stacking small to large, it is just too hard to get to in a rush.
- In my Before and After Example above, we are using a Lazy Susan. You can use various options.
- Drawer:

10. Cupboard:


Add a quick extra (under) shelf for plastic lids:
11. Toss small lids in a small to medium clear basket

12. May I suggest placing the give away (you know the ones that you send family off with left-over food in) put it in a different location. I used two extra large Ziploc Bag (you can get them at the Dollar Tree too). One for lids, and one for the containers, then I placed them in the pantry.
Awesome! You did it, nice job! If you need any personal help, just email me (click here)
Oh, and for every $40+ order placed, I will email or send you a hard copy of these step by step instructions. Happy Organizing! ♥
Need personal in home organizing coaching? I can help. Don’t wait. (click here)
Would you like to order other products? Check out my website.