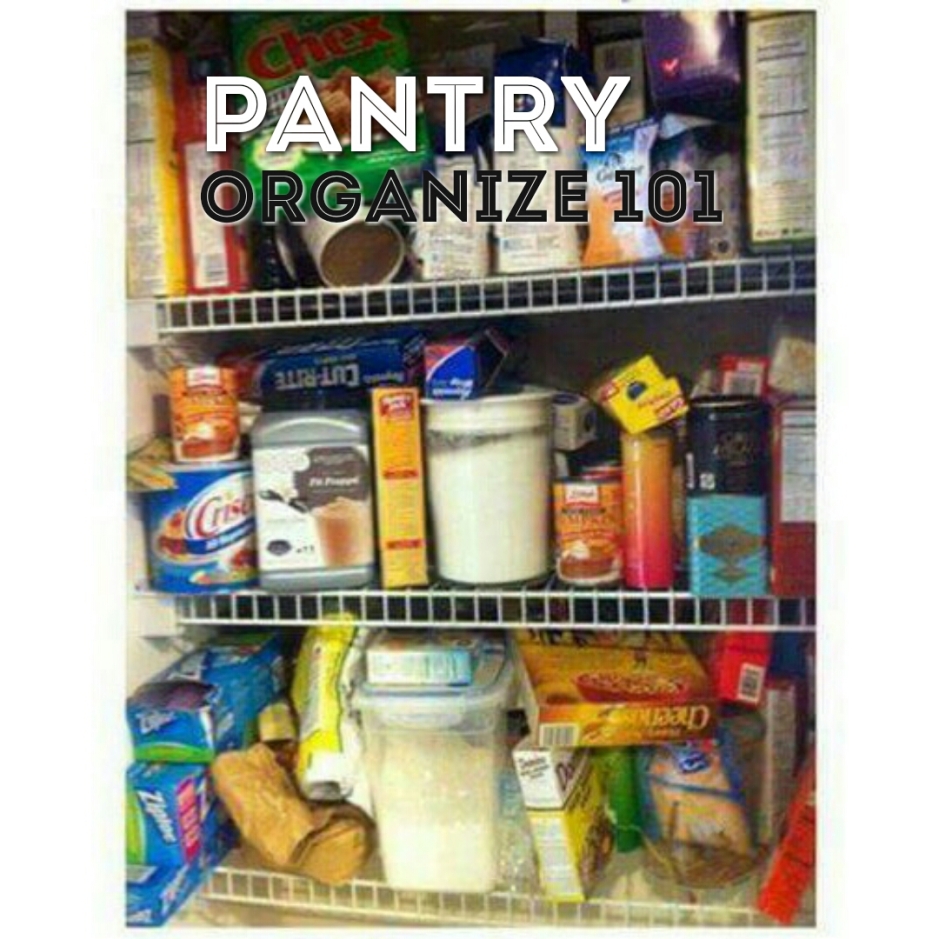

How much more of a pleasure and less of a task putting groceries away can be, when you have an organized kitchen and pantry. It is simple to keep up once you form order. Simple instructions:
- Clear a large surface area to work on. Such as a table or clean counter
- Have (several) large Garbage Bags
- Have a Bag with handles for possible donate to a Shelter
- Cleaning spray and towel
- Have a recycle bin within reach
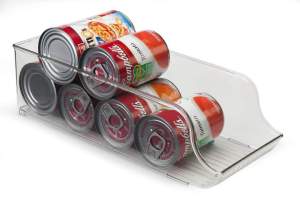
- Your new (and existing) containers can be off to the side. (using clear containers is key)
- Pull out every item. One by one.
- Ask yourself these three questions:
- Is this expired?
- Is it healthy for our family?
- Will we eat this?
- Toss it if expired
- Put in donate Bag if your family won’t eat it or it is unhealthy. IF it is not expired, that is
- Items you are keeping, set on counter or table
- Once all shelves are completely empty, spray and wipe down inside of cupboard doors first. Then wipe down each shelf starting from the top, working to the right
- Now we will start sorting. Items that are not used or eaten often, should go on top shelves. Unless very heavy or bulky. Items such as (if you must) unhealthy snacks, marshmallows, etc. Put them in the Containers that will fit items, and put away
- Then start sorting and setting in groups, like items
- Canned goods- sort by soups, Canned sauses, etc
- Boxed goods
- Baking items
- Oils
- Sauses, merinates
- Bagged items, chips
- Snacks
- School snacks (should be in own category, makes packing lunches so much easier!)
- Baking items, such as sugar, flour, etc, place in Air Tight Container
- Once every item is sorted, find the correct sized containers for each category. Place items in the designated container, and place on shelf.
- Once items are in containers, you can move them around from shelf to shelf depending on height and convenience. This part of the task is much easier when your items are in the containers.
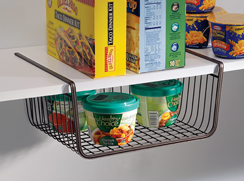
- Another option if you are tight on space
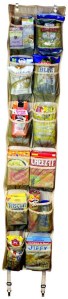
- Or go vertical
- If you want to go one step further- Labeling. It adds a touch of class and function.
- You may find you have more food than containers, or you need a few more containers. No problem! Just reach out to me, and I can help. Simply set the leftover food or items on a shelf off to the side, until your containers arrive. If you need to exchange or return anything, I am happy to help!
And voila! 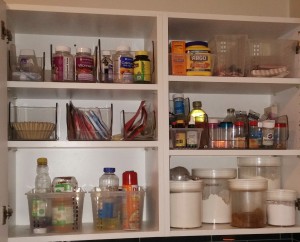
Congratulations, you did it! I’m proud of you!! Take your own picture now, to show you are following through with your goals of a Journey to an Organized Home!
What are you waiting for? Get Organizing today! (click here)
How I can Help:
1. Journey to an Organized Home Monthly Group. Organize Your Entire Home in a year. Earn 10% off Products for sticking with the Group.
2. Would you like Free Organizing Products? Host an Event
3. Personal In Home Organizing Consultation (personal in home, hands on coaching)
4. Simple + Easy way to earn extra income
